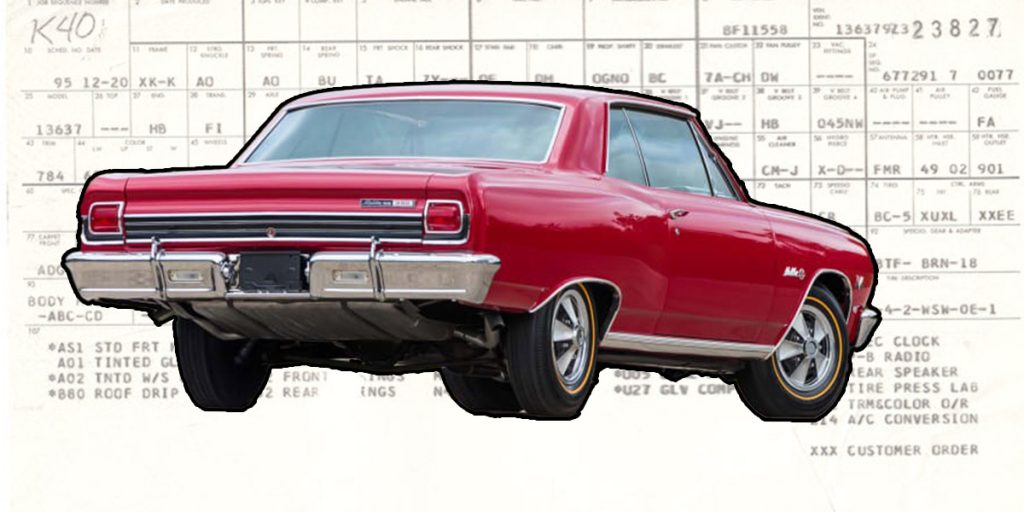
1964–1972 Chevelle RPO Codes: A Complete Breakdown If you’re restoring, decoding, or just plain geeking out over a 1964-1972 Chevrolet Chevelle, then you’re probably checking
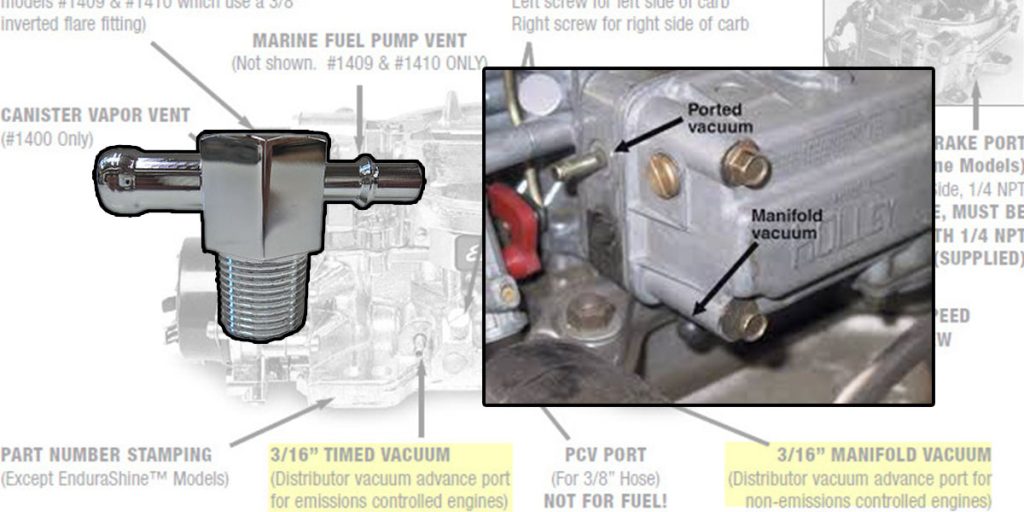
Ported vs. Manifold Vacuum for Distributor Vacuum Advance in GM Applications In the world of classic General Motors (GM) engines, proper ignition timing is needed

Get $25 Off* when you apply the Code: SS299 during checkout on orders over $299. Max Discount $25. Valid until 06/21/25 (9pm ET). Don’t miss out on this opportunity to save on the essential parts that keep your restoration moving forward.
