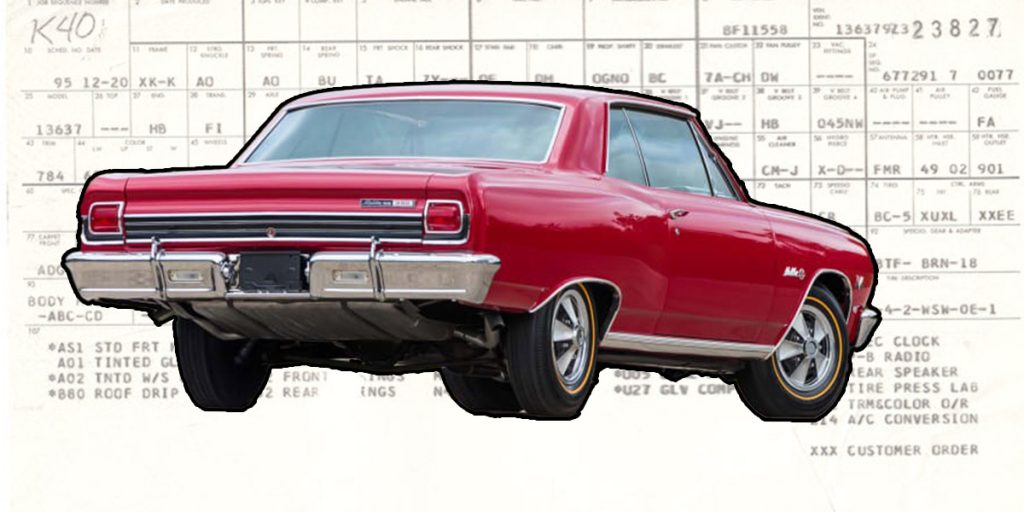
Installing Front Coil Springs In A Classic Chevelle, Camaro or Later Nova
Installing front coil springs in the front of your Chevelle, Camaro, later model Nova or even C-10 trucks is about the same process. There’s a few different ways to accomplish this with varying levels of safety. Here at Ground Up we always to you to be safe so we are going to show you one of the safest ways out there to do this.
This method works great whether you have the body on the frame or not. Generally speaking, with the body and the weight of the engine in the car it’s easier to swap out coil springs as you can use the weight of the body. In this example though we are going to assume you don’t have that luxury.
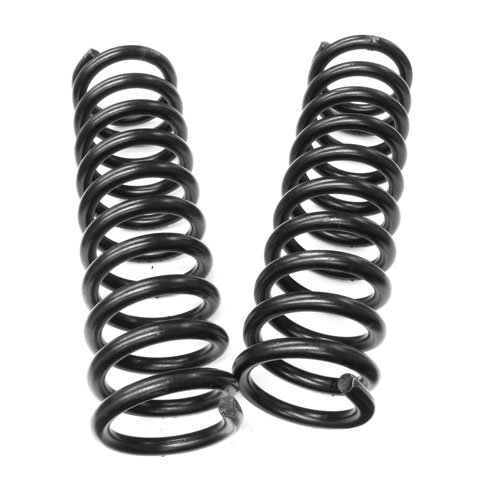
The original height springs have to be compressed a bit to be able to be installed. The stock springs are taller than the distance between the upper and lower mounting points. If you’re using a lower coil then this process is easier as you usually don’t have to compress the spring to install it. If you want to know how to install a coil over, we covered that in a previous article.
Tools Needed To Install Front Coil Springs
There’s really only one special tool you’ll need to install coil springs and that’s a coil spring compressor. There are a few different versions out there. Two that are similar have clamps with a threaded rod that physically compress the spring. One will work out the outside of the spring, while the other works on the inside of the spring. These will work and are available for rent at your local auto parts store. However, these aren’t the safest methods as they compressor can pop off and send the spring flying.
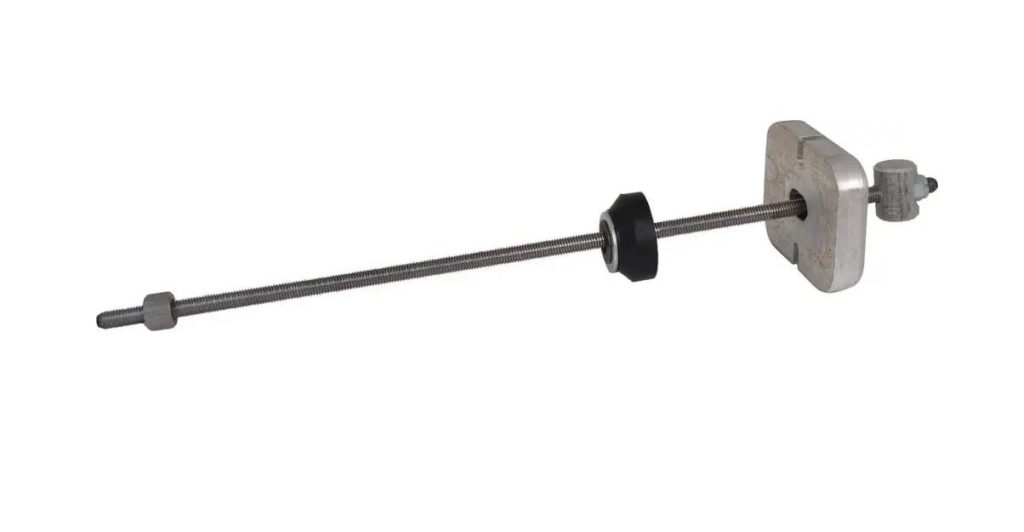
The compressor shown here is the safest way possible as it prevents the spring from flying out during installation or removal. It’s actually designed for a 1955-1972 Ford Thunderbird, but works in this application. This one can actually be made from parts at your local Home Depot or Lowes. It’s essentially a 5/8″ diameter 2 foot long length of all-thread with a few plates on each end and some nuts and washers.
Besides a coil spring compressor you’ll need a floor jack, jack stands, and some basic hand tools.
Installing The Coil Spring
We are going to assume here you’ve already take the old springs out, the car is up safely on jack stands, and you’re ready to install the new coil spring. You’ll want to swing the lower control arm down, so that it’s almost pointing to the ground.
Before you go fighting the coil spring in, you need to make sure it’s clocked properly and sitting right side up. The top of the spring will be ground flat. The lower will not be ground flat and will have a “pig tail” piece sticking down. That “pig tail” piece has an adjoining depression in the lower control arm it fits into. If you’re running tubular arms it might not have this depression but stock arms do.
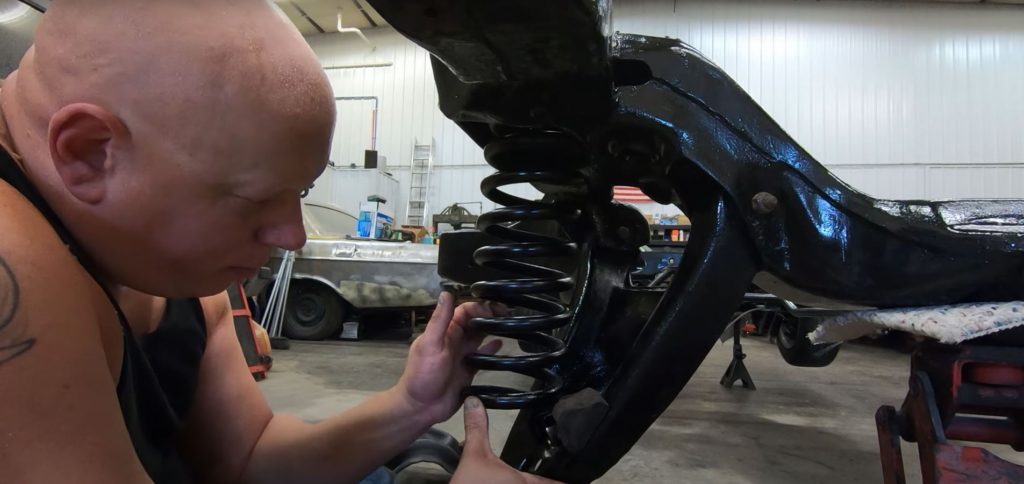
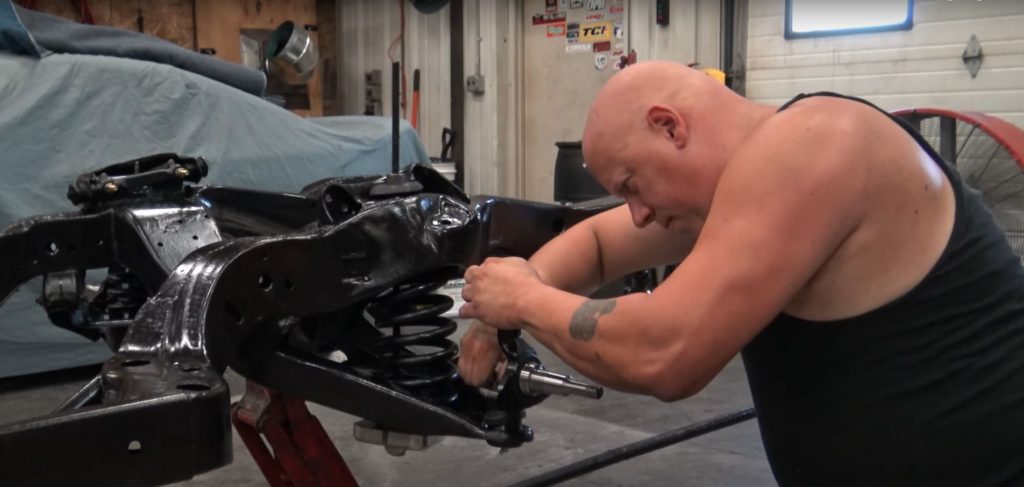
With the spring orientated properly, slide the spring into the the upper pocket, making sure its centered. Push the lower part back to where it’s touching the lower control arm. It’s a little bit of juggling but you’ll then have to slide the all-thread down through the top shock hole, through the coil spring, and then through the lower shock hole mount on the control arm. Assemble the plates and nuts so there is a tiny bit of tension on it to keep everything in place.
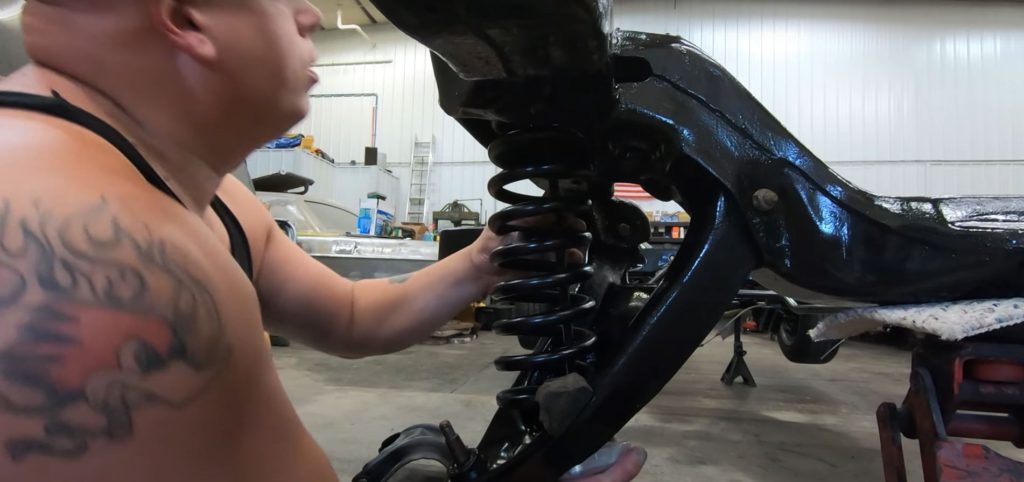
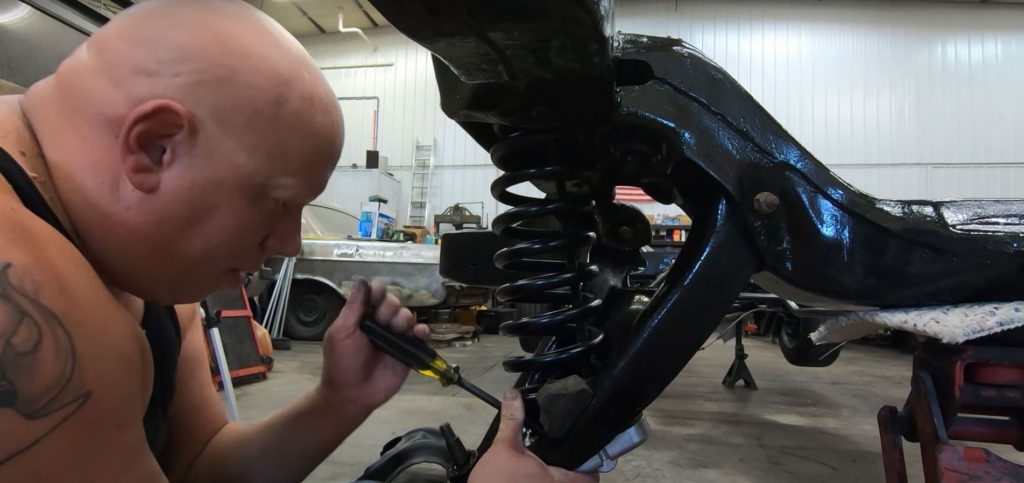
Next you’ll want to slowly tighten down the compressor, and with a large screwdriver or prybar, lift and push the bottom of the coil spring over so that it will pop into place. This can take a little bit of trial and error to get it in there and make sure to pay attention so that your fingers or hands don’t end up in a pinch point. At this point you can see why we suggested this style of coil spring compressor – if the spring pops out of the pocket, the all-thread going through it will keep it in place.
Once you have the coil spring in place, you’ll need to tighten down the compressor to raise the lower control arm up. If you have an engine and body on the frame, you can raise it up using a floor jack. Once it’s raised up a bit you can then set the spindle on the lower ball joint, tighten down the castle nut, and install a cotter pin. Grabbing the upper control arm you will pull it down until the ball joint inserts the spindle, then again tighten down the castle nut and install the cotter pin.

The last few steps here are to release the tension on the compressor and remove it. Then you can slide the shock into place and install that using the two bolts on the bottom and the nut on top. When it’s a traditional coil spring like this, the shock mounts to the bottom of the control arm where if it’s a coil over, it mounts on the top of the control arm.
If you need help determining which coil spring to use or have any other questions, please feel free to give our friendly techs a call at (203) 235-1200 or shoot them an email at Info@SS396.com