Installing Your Windshields
Driving down the road, you see something fly up and BAM – chipped or cracked windshield. If you drive your car, it’s almost inevitable. Or sometimes the 50-60 year old windshield just isn’t all that clear, and it’s time for a new one. Whatever the case, a new windshield is in order.
To learn more about windshields and automotive glass, read “Seeing Clearly: Auto Glass.”
Windshield Repair Shop Or Do-It-Yourself?
The next question is, do you hire somebody to replace your windshield, or can you do it yourself? That really boils down to how comfortable you are wrenching on your car. Replacing windshields isn’t too terribly hard, but it can be tricky.
If you do go with a repair shop, ask around and find somebody reputable and somebody who knows old cars. The newer windshield companies don’t have the knowledge or time to do it right with an old car.
What To Look For In A Shop
Generally speaking, word of mouth is going to be your best bet here. Or call local restoration shops and ask them. As we mentioned, it’s better to have a restoration shop do such work, and not a newer windshield replacement company.
Types Of Windshield Gaskets
On the early GM 60’s and 70’s muscle cars, there were generally two types of gaskets or mounting systems for windshields. Both can be done at home in your garage; they just take time and patience to complete.
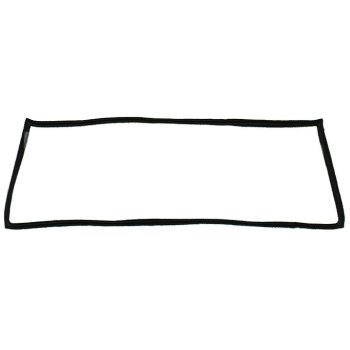
The first is a rubber gasket. These are what were used in the 50’s as well. These are grooved where the windshield sits in a groove all the way around the gasket. Then the gasket has another groove that straddles a metal flange, often called a pinch weld.
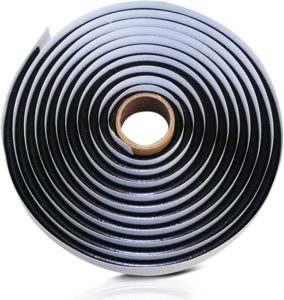
The second type is a butyl rubber. Think of it sort of as a rubber rope. With this, you lay it down in the channel, then press the glass on top of it, in place. It’s much easier to install than the rubber gasket version.
The Downfalls Of Old-Style Windshield Gaskets
Whether your classic ride uses the rubber gasket version or the butyl rubber version, there’s a big flaw in both. The windshields are pretty easy to pop out.
If you were in any sort of head-on collision and you went flying into the windshield, it won’t really hold you in the car and will pop out. This is a major safety flaw that’s been fixed in modern cars.
Now, there are ways to help on an old ride, which we will get into shortly.
Installing Rubber Gasket Windshields
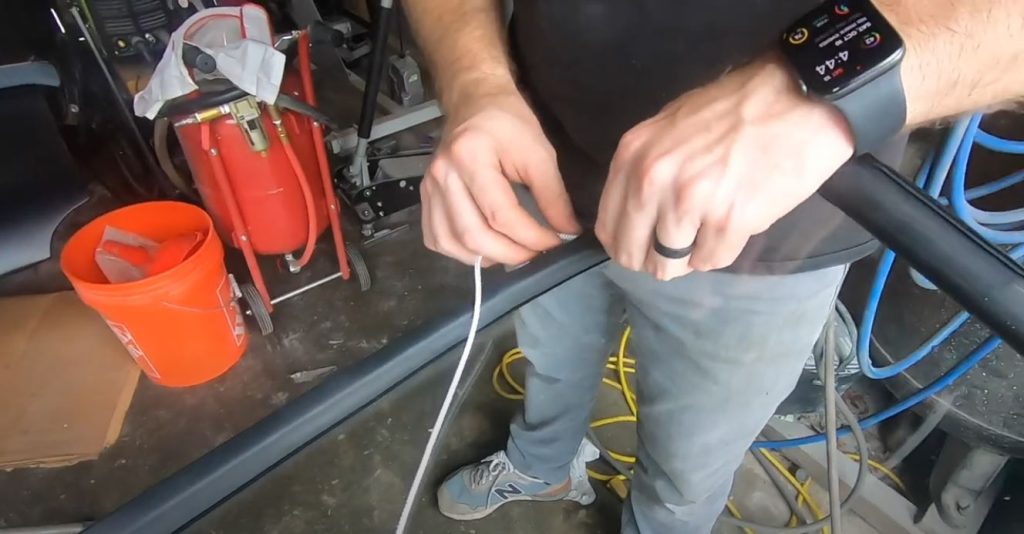
If you’re installing a rubber gasket style, such as on a ’67 Nova, you’ll need a few tools to accomplish this. It helps to have a thin piece of rope and some hooks that aren’t too sharp.
The process is fairly straightforward. The gasket is installed onto the edge of the windshield all the way around. Then, in the groove that goes over the pinch weld, you’ll lay your rope all the way around for use later. Lots of these cars have stainless trim that goes around the window as well. This actually installs into a third groove in the rubber gasket, and you’ll install those before you install the whole windshield into the car.
At this point, the rubber gasket has been installed around the windshield. Rope has been laid into the groove that goes over the pinch weld. Lastly, the stainless steel trim is installed into the last groove.
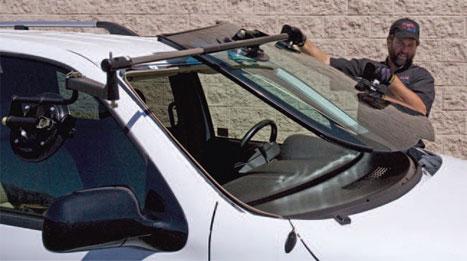
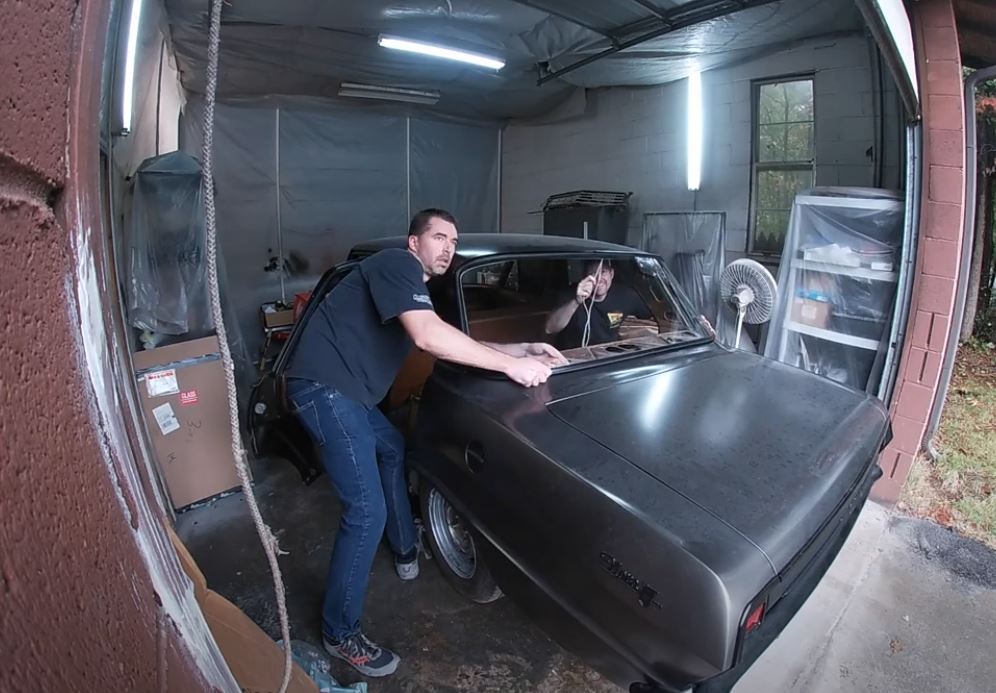
It is highly recommended to have an extra set of hands during the installation process. You’ll need to lift the windshield up and into place. When you’re setting it down, the groove in the rubber that goes over the pinch weld should be straddling that pinch weld on the bottom side. Take some time to make sure the windshield is centered.
The next step is to use that rope to flip the lip on the gasket up and over that pinch weld, starting on the bottom and going around. You’ll have to work at this. Once the bottom is flipped into place, you’ll need to push/finagle the windshield all the way down before starting on the sides. This is where that extra set of hands comes into play, and they can help push and maneuver the windshield.
Keep going all the way around, bit by bit. The hooks without a sharp end can be used to flip that rubber over the pinch weld. In fact some people don’t use a rope and only use a hook – it’s personal preference.
Sometimes you don’t get the windshield aligned perfectly. Or it just isn’t sitting down properly. Not a big deal! You can un-flipping that rubber gasket and remove the entire windshield, then start over if needed.
Butyl Rubber and Epoxy
Butyl Rubber is generally much easier to install than a rubber gasket and easier to remove as well. With butyl rubber, you basically lay the rope on the edge of the glass or the edge of the opening, then set the glass in there. Give it a few presses to seal it up, and you’re done!
There are different thicknesses of butyl rubber, though. You have to have the right thickness, or the trim won’t fit. It’s sort of like layers – there’s the butyl rubber, then windshield, then trim. If the butyl rubber is too thin, then the trim sinks down and won’t fit snug against the glass. If the butyl rubber is too thick, then the trim won’t be able to reach the clips.
We had mentioned earlier that there’s a way to help increase safety with the butyl rubber. That is to use a urethane epoxy instead of the butyl rubber and essentially glue the windshield into place like a modern windshield. This requires a bit more skill, though, as you need to use proper epoxy, and it has to be the correct thickness.
With the epoxy version, though, you have a small strip of foam that attaches to the glass windshield. This acts as a dam for the epoxy. Then you use a primer on the pinch weld, and apply the urethane epoxy to the glass itself. Again, not impossible to do at home, but it is helpful if you have help from somebody who has done it before.
If you need any windshields, gaskets, clips, or molding to complete your glass install, hop on SS396.com or give our friendly techs a call at (203) 235-1200!